Service
DIY Valve Cover Gasket Replacement Guide | 2.0 TSI & 2.0 TFSI
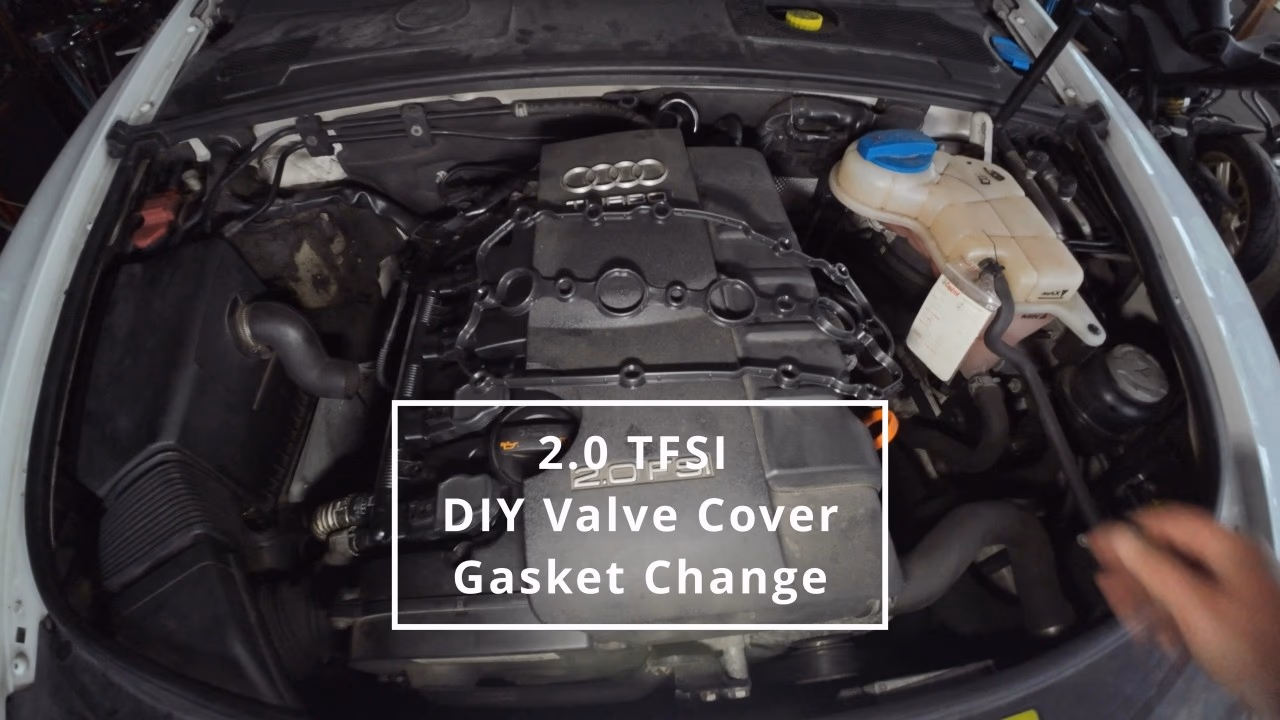
Replacing the valve cover gasket on a 2.0 TSI or 2.0 TFSI engine is a common and cost-effective DIY repair that can fix oil leaks, restore performance, and prevent misfires. The rubber gasket degrades over time, allowing oil to leak into the engine bay or spark plug wells. This guide, using an EA113 engine as an example, will walk you through the entire process, which typically takes less than an hour.
🧰 Tools and Materials Needed:
- New valve cover gasket for 2.0 TSI / TFSI engine
- 10mm socket and ratchet
- Torque wrench
- Plastic scraper or gasket remover
- Brake cleaner and rags
- RTV silicone (if required by your gasket kit)
- Optional: rubber mallet, small pry bar, hose pick, pliers, hot water for stubborn hoses
⚙️ Step-by-Step Replacement Guide:
- Disconnect the battery for safety.
- Remove the engine cover.
- Unplug ignition coil connectors and remove the coils.
- Remove any PCV or vacuum hoses connected to the valve cover. 🔧 Pro Tip: Pour hot water on stubborn hose ends to soften the rubber for easier removal.
- Unscrew all valve cover bolts (10mm socket) and keep them organized.
- Carefully loosen and remove the valve cover. Use a rubber mallet or pry bar if needed, but be patient.
- Clean the mating surfaces with a plastic scraper and brake cleaner for a perfect seal.
- Install the new gasket, pressing it firmly into the groove. Apply RTV silicone to corners if recommended by your kit.
- Reinstall the valve cover, ensuring it's properly aligned.
- Torque the bolts to 10 Nm, following the correct tightening sequence from your service manual. 📸 Check the video for the bolt order.
- Reconnect all hoses and wiring.
- Reinstall ignition coils (torque to 5 Nm) and the engine cover.
- Start the engine and check for any leaks around the gasket.
🚘 Why This Repair Matters:
- Prevents oil leaks and burning oil smells.
- Fixes poor ignition and keeps the engine clean.
- Extends the life of the engine and coil packs.
- An inexpensive part for major peace of mind.
✅ Final Tip:
Enjoy a leak-free engine and the satisfaction of a job well done. Doing this repair yourself builds confidence and saves money.